Module Minute
Have you ever created decorative Motifs in 5D™ Design Creator or 4D™ Fabric Decorator? Making a special Motif for a holiday or a personal occasion can be great fun.
How about a kite-flying Motif to incorporate into an Encored design?
In 5D™ Design Creator, you can create a Motif over a background picture, or use a MiniPic  or
Shape
or
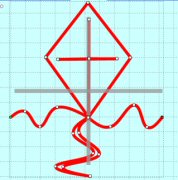
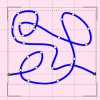
Shape  and modify the line, or simply freeform draw a line like the kite pictured here.
Choose Start a New Design with no Picture in the ExpressDesign Wizard. Select the Draw Window, which has tools for creating and saving Motif stitches. Change the Hoop to a
Height and Width the size you would like your Motif to be, and Finish.
and modify the line, or simply freeform draw a line like the kite pictured here.
Choose Start a New Design with no Picture in the ExpressDesign Wizard. Select the Draw Window, which has tools for creating and saving Motif stitches. Change the Hoop to a
Height and Width the size you would like your Motif to be, and Finish.
Add a Mini Pic or Shape and
modify the lines, or draw your own line with Freehand Draw  or
Polygon Draw
or
Polygon Draw  .
.
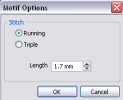
Before you draw, consider how a Motif Line or Motif Fill stitches. Begin drawing at the left side of the work area on a specific horizontal grid and end on the same grid at right,
so you don't get an extra connecting stitch as the Motif repeats. Keep the line 'continuous', with no breaks.
Create the shaping for the Motif pattern by the placement of round or square points or nodes as you draw from the start toward the end. Save your Motif in the 5D™ Embroidery System
software with Export to My Motifs  in the
Draw Motifs toolbar
in the
Draw Motifs toolbar  .
Also, Save as Drawing
.
Also, Save as Drawing  , and create a .4qb file in case you want to adapt the Motif later.

In 4D™ Fabric Decorator software, choose Create New Motif in the 4D™ Fabric Decorator Wizard, and load and size a background image. Use the AutoTrace tools in the Wizard, or
finish the Wizard and use the drawing tools to create your Motif. Export to My Motifs  and
you are ready to design using Motif Fills in 4D™ Design Creator or 4D™ Fabric Decorator software.
and
you are ready to design using Motif Fills in 4D™ Design Creator or 4D™ Fabric Decorator software.
For more information on how to create your own decorative Motif in 5D™ Design Creator or 4D™ Fabric Decorator, select Help, and then the Index tab. Type in Motif, and the links will open
to help you find steps to create a Motif stitch!


 Icon Index
 .
Click the Send 1
.
Click the Send 1  or Send 2
  tabs
and select your personal sewing and embroidery machine from the list.
tabs
and select your personal sewing and embroidery machine from the list.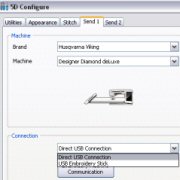
 ,
and then choose your personal machine's embroidery format under Save as Type.
,
and then choose your personal machine's embroidery format under Save as Type.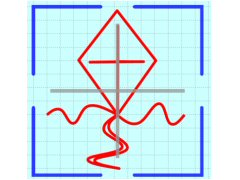
 Skill Builder
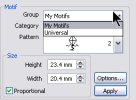
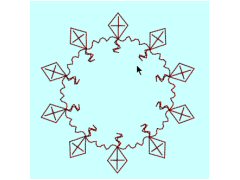
 , and then Circle. Experiment with the number of repeats, using Setup to return to the settings for Encore.
Remember, in the 5D™ Embroidery System software, you can click and drag any of the Encore repeats to adjust the Encore elements! When you are through, right-click,
and either add some additional enhancements to your design, or Save As
, and then Circle. Experiment with the number of repeats, using Setup to return to the settings for Encore.
Remember, in the 5D™ Embroidery System software, you can click and drag any of the Encore repeats to adjust the Encore elements! When you are through, right-click,
and either add some additional enhancements to your design, or Save As  . Save the
Motif Stitch
. Save the
Motif Stitch  and open it in the 4D™ Embroidery module to Encore the design.
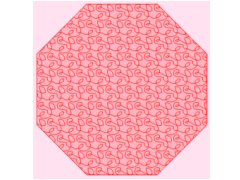
 and
adjust the Grid size as small as it will go, so you can use the Grid as a reference when drawing.
Use Freehand Draw
and
adjust the Grid size as small as it will go, so you can use the Grid as a reference when drawing.
Use Freehand Draw 

 SOS
SOS