
mySewnet™ & PREMIER+™ 2 Software Newsletter - November 2021
Welcome to the mySewnet™ and PREMIER+™ 2 Embroidery Software Newsletter. Check out our feature and then join us for some inspiration!
Today's topic is Designing Artwork with Draw & Paint  .
.
Feature
Feature

Interactive Features in Draw & Paint
The mySewnet™ Embroidery Software Platinum version includes mySewnet™Draw & Paint
, a module/application for both Windows and Mac OS, used for designing artwork.
mySewnet™Draw & Paint is a new feature for Mac OS users.
mySewnet™Draw & Paint is a versatile and powerful drawing package with great interactivity between Vector and Raster drawing, all in one unified program!
mySewnet™Draw & Paint can be opened from the mySewnet folder in the Start Menu in Windows, or from the Launchpad  on Mac.
Additionally, you can pin a shortcut to the Windows Taskbar or Start menu, or make a shortcut in the Mac Dock.
You can also link to mySewnet™ Draw & Paint from within certain mySewnet™ modules and apps when adding a Background, or to design or insert a graphic image for Digitizing. How handy is that?
So, what will you find for design functionality? Within the mySewnet™Draw & Paint window, tabs include File (found in the main menu in Mac) Draw, Paint, Insert, Multiply, View and Help (in the main menu in Mac).
In the Windows version, the tabs appear in a Ribbon Bar.

In the Mac version, the tabs are buttons in the Design Panel (Draw  ,
Paint
,
Paint  ,
Insert
,
Insert  ,
Multiply
,
Multiply  and View
  ) and there are also functions in the menus.

The Draw tab is the Vector graphic design page, with a collection of tools to draw or edit Lines or Fills as mathematically calculated images. Draw also has a FilmStrip for selecting objects and rearranging their ordering within the drawing.
The Paint tab is the Raster graphic design page, with tools for designing and editing images using Pixels. Raster graphics lose quality when resized, but can be richly shaded and textured.
The Insert tab is used to add images to the Draw or Paint page, and recognizes many file types. For Windows:

- If you insert a Vector image, such as .svg, .ecq (the default working file type in Draw & Paint), or .4qb, they appear on the Draw page as objects in the FilmStrip, and may be edited with the Draw page tools.
- If you insert a Raster image, such as .png, .jpg or .bmp, the image is active for editing on the Paint tab. A Paint image also appears as an embedded background on the Draw tab, so you can easily use the image on the Paint tab as a background guide for redrawing as a Vector in Draw.
You can also link to mySewnet™ Draw & Paint from within certain mySewnet™ modules and apps when adding a Background, or to design or insert a graphic image for Digitizing. How handy is that?
Additionally, you can design or Insert images in the Draw tab, and then send them to the Paint tab  , useful for sizing artwork in Pixels for designing Motif files, or for working with images in the PhotoStitch wizard/assistant or Sketch, or to print as fabric when designing Appliqué!
The Multiply tab has tools to repeat selected design elements, ideal for designing perfectly aligned elements as a
Circle  ,
Horizontal
,
Horizontal  or
Vertical Line
or
Vertical Line  , or
Tile
, or
Tile  of elements.
Note: Multiply uses Vector objects from the Draw tab, rather than Raster images from Paint.

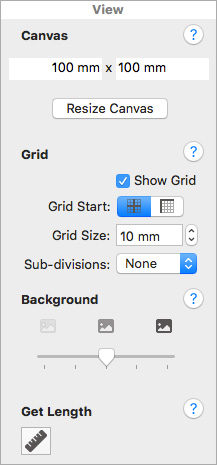 The View tab has tools for adjusting the Canvas (work area) size, Grid Settings, visibility of Background, and the Get Length tool.
If you aren't sure where to start when learning the rich and varied tools in mySewnet™ Draw & Paint, check out the mySewnet™ Draw & Paint Reference Guide, available for download as a PDF file in either Windows or Mac versions, at https://softwarehelp.mysewnet.com/.
Note: Many functions of mySewnet™ Draw & Paint are available in the Windows PREMIER+™ 2 Create and PREMIER+™ 2 PhotoStitch modules. However, you cannot have both Draw and Paint open at the same time in any given program session.
Be sure to check out the Inspiration page of this month's newsletter for some encouragement to begin designing your own original art.
INSPIRATION
INSPIRATION
Using Backgrounds and Artwork
Designing or editing artwork for Digitizing, for printed Appliqué Fabric, and for Background images is now easier than ever!
mySewnet™ Draw & Paint now has the ability to design and/or edit both Vector (Draw) images and Raster (Paint) images within the same open program window.
We have all the tools at hand in a single place to design or edit clean and crisp or rich and complex art, ready for our personal projects. Here are some ideas to get you started!
Design an exotic butterfly image using the Insert tab and the Draw tab tools (shown below):
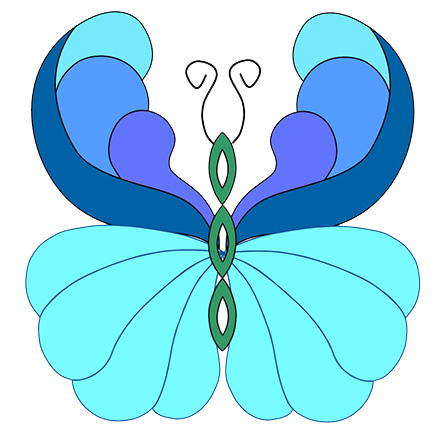
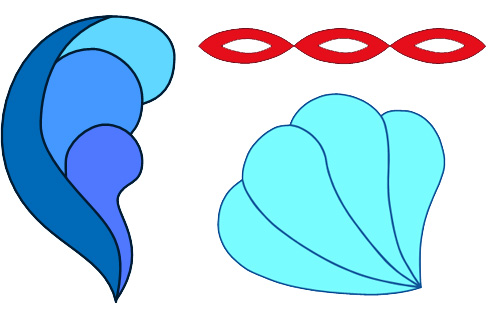
Design the butterfly using elements from the Design Gallery  in the Insert tab: Borders section, Chain Border 01.ecq for the body; Petals section, Petals 01.ecq for the upper wings; Quilting section, Peacock 01.ecq for the lower wings.
The image was assembled and redesigned using scaling, duplicating, and rotating. Assembly was quick and easy using the FilmStrip to select objects or change stitch order. Settings used include Line Width .5mm, Line color Gray 80% for better color separation when digitizing in ExpressDesign or with QuickCreate tools. The Antenna was drawn using Draw tab tools, Line Width 1mm.
Save as a system .ecq for fast later edits, then select File / Export Picture in Windows, or Export as Picture in Mac, and make a .pgn, an .svg, or a .jpg as needed to use in your project.
Words Your Way using the Insert tab and Insert Lettering
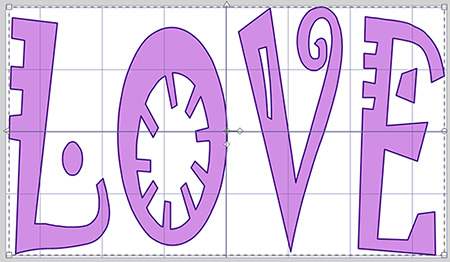
The artwork shown above was designed with the Insert tab, Insert Lettering  . Settings include the TrueType Font Jokerman, Style Regular, Size 72. Adjust as desired with corner handles on the select box. The Line color shown is dark violet-blue to contrast with the paler Fill, Line Width .5mm.
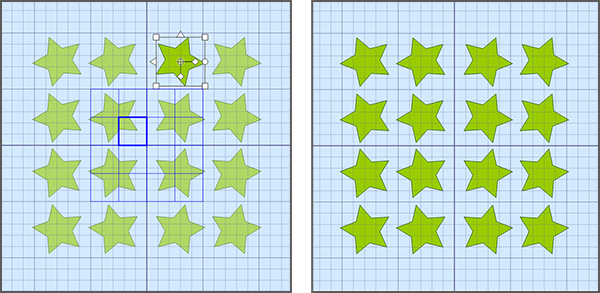
Multiplication Magic with the Multiply Tab (shown below).
The first multiplied artwork below starts with a Star from the Insert tab, Shape 36, Insert Shape.

To design a tile of stars at wonky angles to each other, select the Multiply tab .
Tile  , Horizontal Repeats 4 and Mirror
  , Vertical Repeats 4, Size 25, and Mirror
  . When you select Enable Multiply , you can click, drag and rotate the selected star to change the tile of stars!
Click Apply Multiply
. When you select Enable Multiply , you can click, drag and rotate the selected star to change the tile of stars!
Click Apply Multiply  to finalize the tiled artwork!
These are just a few of many, many ways to use mySewnet™ Draw & Paint to create or redesign your own original artwork for Digitizing, Backgrounds, and even to use with your electronic cutting machine! Check out the Draw & Paint features and don't forget to download and use the very helpful information from the mySewnet™ Draw & Paint Reference Guide to reap the benefits of this creative portion of the mySewnet™ Platinum software!
Did you know ?
Vector graphics (Draw tab) utilize points to mathematically define artwork, which can be closed to make a shape, or open to make a line or curve, and are best for clearly defined artwork without shading. Vector graphics scale well without losing quality and can be adjusted with great precision.
Raster graphics (Paint tab) use squared pixels, or dots, to define areas of an image, and are best for highly shaded or blended colors, such as photographs or paintings. Raster graphics have a rich look but lose quality when scaled larger or smaller, and can require extensive editing to retain their precision when resized.
Have a fabulous day, from the software team at mySewnet™ Embroidery!
PS:
Join us next month to explore Groups, and how they help you keep it all together!