
mySewnet™ & PREMIER+™ 2 Software Newsletter - April 2021
Welcome to the mySewnet™ and PREMIER+™ 2 Newsletter.
Check out our breaking information in News, then stick around for some inspiration!
Today's topic is mySewnet™ Embroidery Software: Linking from the Embroidery Module or App.
News
News
1.1 Update
Version 1.1 of the mySewnet Embroidery Software is now available.
Download here: https://download.mysewnet.com
This update includes:
- Install in any of 13 languages.
- Insert Library designs without forcing your entire project to become protected.
- Edit Library designs in Stitch Editor.
- New Quick Create from Background tool in Digitizing.
Feature
Feature
Linking from mySewnet™ Embroidery.
Welcome to the mySewnet™ Embroidery Software newsletter! mySewnet™ Embroidery Software offers many options for designing embroidery, or editing existing embroidery designs. Today, we'll discuss a new functionality, Linking from the Embroidery Module/App  !
!
Linking is an entirely new concept in the mySewnet™ Embroidery Software.
With PREMIER+™ 2 and earlier embroidery systems, we accessed modules via a QuickLink toolbar, and then used Copy  (on Mac, File or Actions
  > Copy, or Command–C) and Paste
  (on Mac, File or Actions > Paste, or Command–V) to quickly edit or build embroideries from one module to another.
In mySewnet™ Embroidery Platinum System, we have a very exciting new way to take a design element from the mySewnet™ Embroidery Module or App, by linking it to another Module/App where we can edit or redesign, and then returning to the Embroidery Module/App to continue adding more elements.
Linking is easy, efficient, and enhances our opportunities for creative design in the new mySewnet™ Embroidery Software! You can link from the mySewnet™ Embroidery Module/App in different ways.
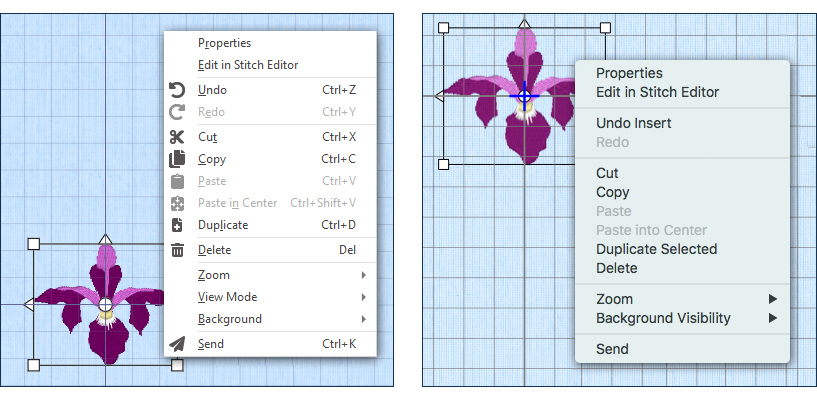
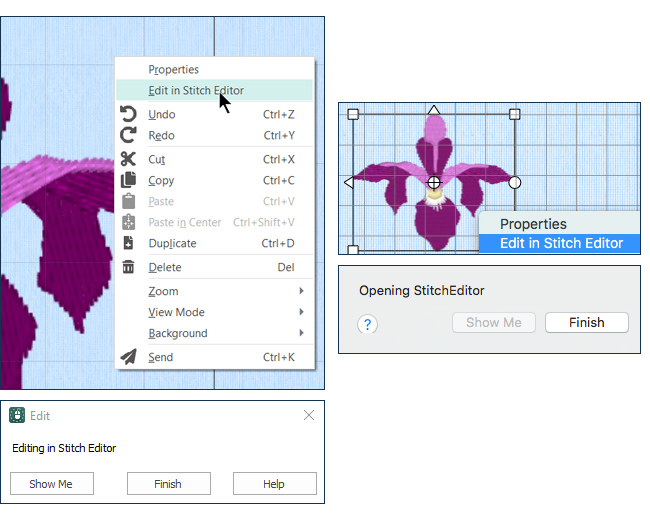
When ready-to-stitch embroidery designs are opened or inserted into the mySewnet™ Embroidery Module or App, a right-click (or Control–click) over a selected design offers a link so you can Edit in Stitch Editor  .
.
Shown below: mySewnet|Samples|Embroidery|Stitch, design IrisSingle.vp4. Windows™ and Mac™ views illustrated.
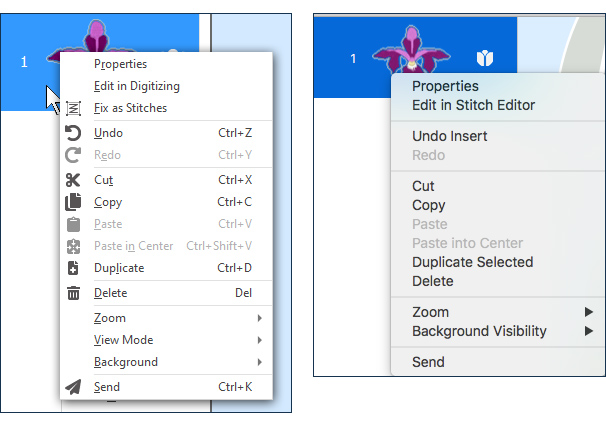
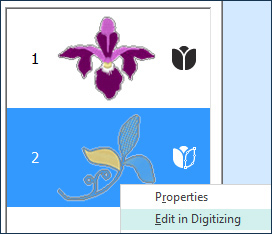
Alternatively, right-click over the design's Frame in the FilmStrip to link and Edit in Stitch Editor .
You can also Open  an .edo file - the native file type for mySewnet™ Digitizing
  (on Mac use File > Open, or Command–O), or Insert
  an .edo file (on Mac use Actions or File > Insert, or Command–I), and link to Edit in Digitizing.
Illustrated below: mySewnet|Samples|Digitizing|Edo|ThreeLeavesC.edo.
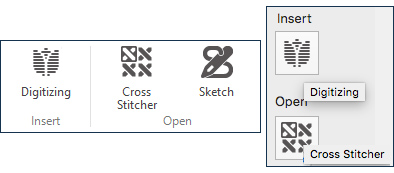
Sometimes you want to design something original, then work with the new design to add Letters or a Frame in mySewnet™ Embroidery. Simply link to Digitizing , CrossStitcher  , or Sketch
  (Windows only) via the Create tab on the Ribbon Bar in Windows OS, or the Create tab in the Control Panel on Mac.
There are some additional links within other modules as well, and we'll look at more ways to link as we step through other functions in future newsletters, so stay tuned for yet to come editions!
You could combine designs created in the PREMIER+™ 2 Embroidery System. You would need to create .vp4 and .edo files with a matching size, and finish your editing in PREMIER+™ 2 Create and PREMIER+™ 2 Modify before saving your components. Then create the final project in PREMIER+™ 2 Embroidery.
INSPIRATION
INSPIRATION

Using Linking when Designing
How can the linking tools help you when you are designing embroideries? Here are a few ideas to get you started!
Edit in mySewnet™ Stitch Editor
Use Insert Embroidery (on Mac use Actions >Insert; File > Insert; or Command–I) to select a ready-to-stitch format.
Link using Edit in Stitch Editor .
Shown below: mySewnet|Samples|Embroidery|Stitch, design IrisSingle.vp4
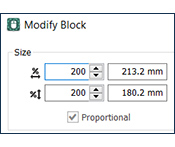
With Resize  , it's easy to enlarge the embroidery. Adjust with accuracy using Modify Block
  in the Home tab of the Ribbon bar (Design tab of the Control Panel on Mac), to 200%, doubling the size.
djust the petals in Object mode, using the mySewnet™ Stitch Editor Object tab.
Here, each darker iris petal was selected, fine tuned with Remove Underlying Stitches  , and in Properties changed to Pattern Fill Waves 1, Pattern 239.
Use the Origin Point handle
 to adjust the angle of the fill to suit each petal as you edit, before moving on to the next petal.
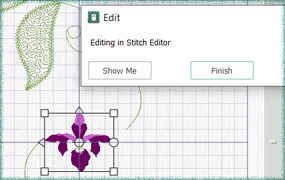
When done, simply close mySewnet™ Stitch Editor , or return to the mySewnet™ Embroidery Module/App, and select Finish in the linking pop-up flag.
Designs are updated live as you work in mySewnet™ Stitch Editor , so your linked embroidery is automatically updated in both linked modules as you work.
TIP: You can reopen and re-edit over and over until your design is just as you'd like it to be!
Edit in mySewnet™ Digitizing
How about changing up an .edo file? You can use any .edo file, including those you've designed yourself in PREMIER+™ 2 Create, or other previous versions of the system.
With the right-click menu from the FilmStrip or over work area, it's fast and easy to select Edit in Digitizing. The .edo file can be adjusted just as any other design object in the mySewnet™ Digitizing Module or App. And when you're through, just close the linked module, and your newly updated .edo object is ready in mySewnet™ Embroidery for you to add Letters, a Frame, and much, much more!
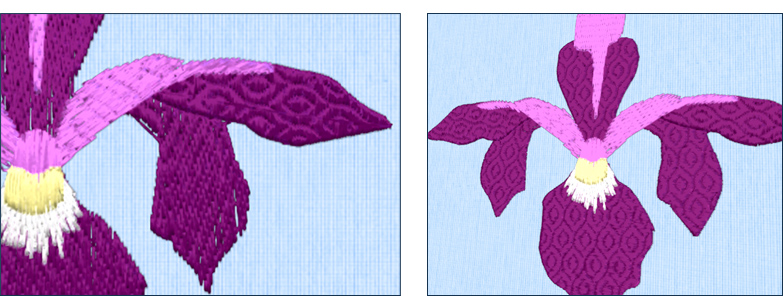
Illustrated below: mySewnet|Samples|Digitizing|Edo|ThreeLeavesC.edo.

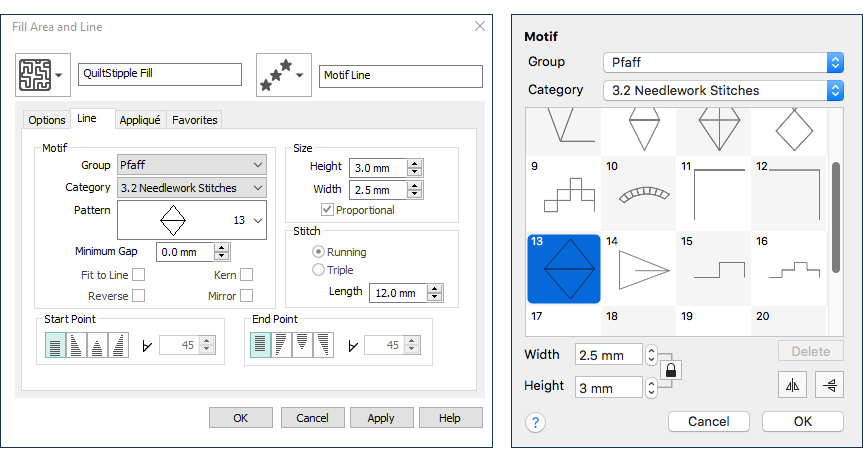
Open or Insert the design in mySewnet™ Embroidery, then update the design by linking with Edit in Digitizing, to change to a Quilt Stipple Fill with 2.0 Gap, and removing the Pattern Fill in the left petal. Edit the Running Stitch Borders, changing to a Motif Line, using the Pfaff Group, 3.2 Needlework Stitches Category, and Pattern 13.

Edit mySewnet™ Library Files (.evp3 and .evp4)
And don't forget, you can also link to edit mySewnet™ Library designs, including Ribbo n Embroideries, in the mySewnet™ Stitch Editor Module or App.
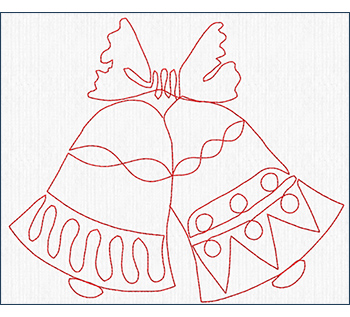
Illustrated below, Ribbon Embroidery 200907037.evp3 from mySewnet™ Library, for HUSQVARNA VIKING and PFAFF wifi enabled embroidery machines with Ribbon Attachment capability.
Original embroidery shown below.

Edited in mySewnet™ Stitch Editor , using Object Editing, by linking from Embroidery, to add additional curvature for a more ruffled look to the ribbon.
Insert Points  , and then move to adjust the shaping of the ribbon stitches.
Did you know...
... With the 1.1 update to your subscription mySewnet™ Embroidery software, Platinum version, you can Link to Stitch Editor to edit locked .evp3 Library designs, including Ribbon Embroidery!
Have a fabulous day, from the software team at mySewnet™ Embroidery!
PS:
Join us next month as we explore creative techniques with Lettering!