
PREMIER+™ 2 Software Newsletter - October 2019
Welcome to the PREMIER+™ 2 Newsletter. Check out our breaking information in News, then stick around for some inspiration!
Today's topic is Design Your Own Lace with PREMIER+™ 2 Create.
News
News

New Software
We have released our brand new software, Premier+ ECQ™. This is a standalone package giving users the ability to make quick designs.
ECQ stands for “Embroidery, Cut and Quilt”, and is a an ideal companion for the complimentary software that comes with your embroidery, cutting or automated quilting machine.
For more information, including where to buy, go to www.PremierPlusECQ.com and select "What is PREMIER+ ECQ™?".
Feature
Feature
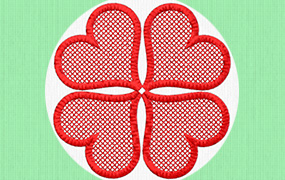
Design Your Own Lace!
Lace is a classic fashion embellishment, and it's highly visible in today's garments. Did you know that you have a plethora of tools for styling lace in your PREMIER+™ 2 ULTRA software package?
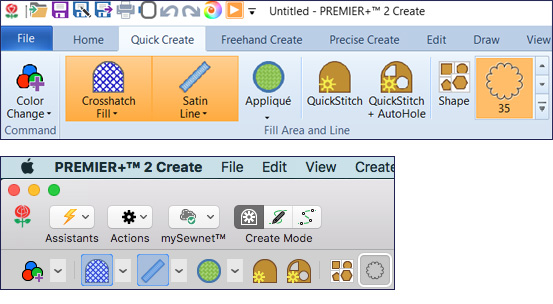
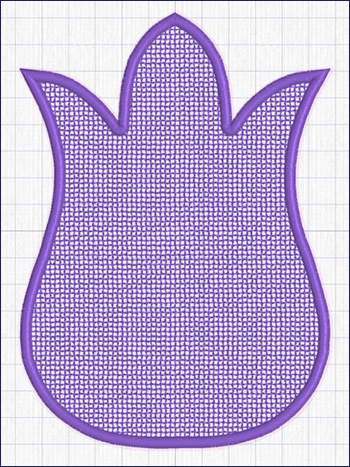
For example, in the Quick Create tab of PREMIER+™ 2 Create  , select Crosshatch Fill
with your choice of Line for a border. Select one of the many Shape options.
, select Crosshatch Fill
with your choice of Line for a border. Select one of the many Shape options.
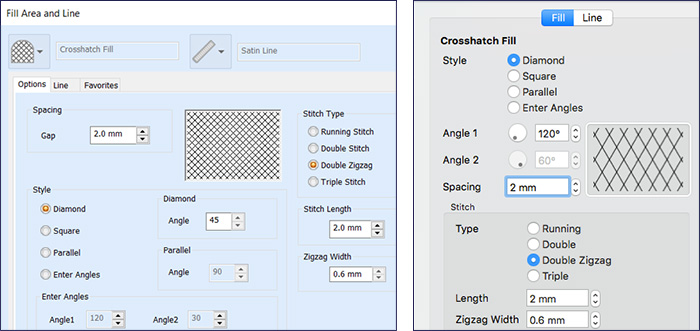
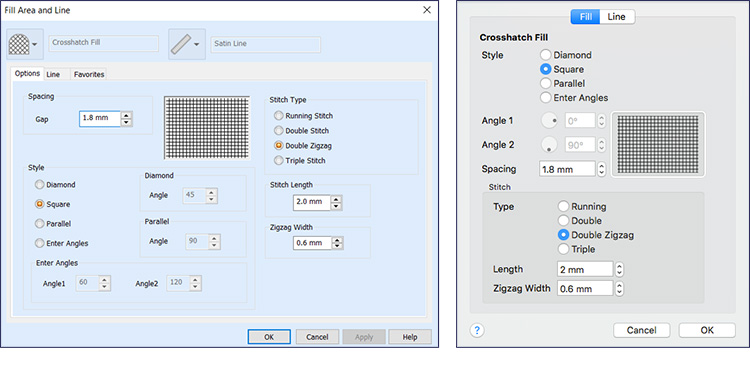
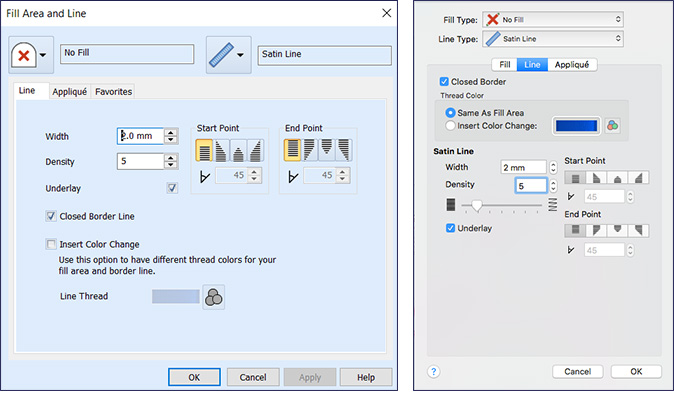
In the Fill Area and Line Options, set your preferred Crosshatch options for Style to Diamond, Square, or Enter Angles.
For the Crosshatch Fill Options, select Double Zigzag Stitch Type to make a freestanding lace base that stitches a straight stitch line out and returns with a narrow open zigzag to strengthen, define and texture the surface of the lace base.
Adjust the density of lace with Gap (Windows) or Spacing (Mac).
Click the Shape icon  and
adjust the size of your new free-standing lace embroidery!
and
adjust the size of your new free-standing lace embroidery!
Preview with Life View  to
see how your lace looks in an enhanced 3D representation.
to
see how your lace looks in an enhanced 3D representation.
Of course, a free-standing lace can also be a base for adding Motif Fill  overlays,
Tapered Motif
overlays,
Tapered Motif  enhancements, or for inserting Letters, Decorative Stitches, and more!
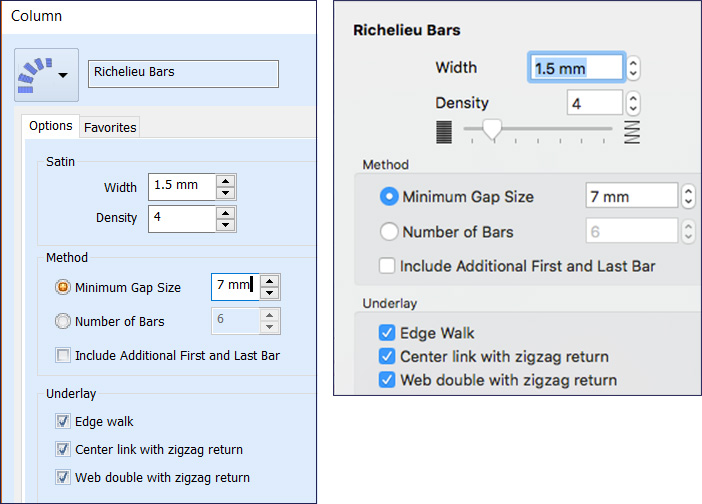
The Richelieu Bars  tool, found in the Precise Create tools, is useful for designing heirloom embroidery.
Richelieu bars can be inserted to bridge open areas in embroidery, introducing a hand-worked
look to your designs.
tool, found in the Precise Create tools, is useful for designing heirloom embroidery.
Richelieu bars can be inserted to bridge open areas in embroidery, introducing a hand-worked
look to your designs.
Lace adds elegance and style to your embroidered creations.
Visit the Inspiration section of the newsletter for some fun ideas for effects you can create using the lace-making capabilities of the PREMIER+™ 2 Create module in the ULTRA system.
INSPIRATION
INSPIRATION
Artistic Ideas for Lace
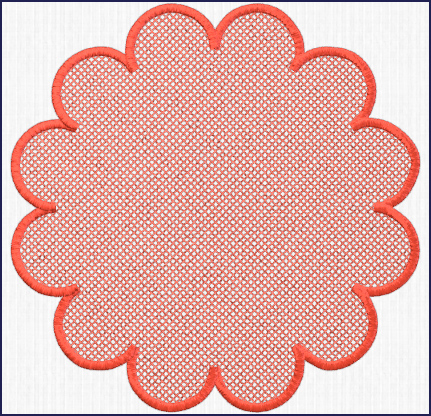
Here are a few artistic ideas for lace! How about a Motif Fill overlay on a Crosshatch Fill lace base?
The Lace shown here is created from Shape 35 in Quick Create, designed with a Crosshatch in Diamond, Spacing/Gap at 2.0, and Double Zigzag Stitch Type.
It's topped with an additional layer of Motif Fill.
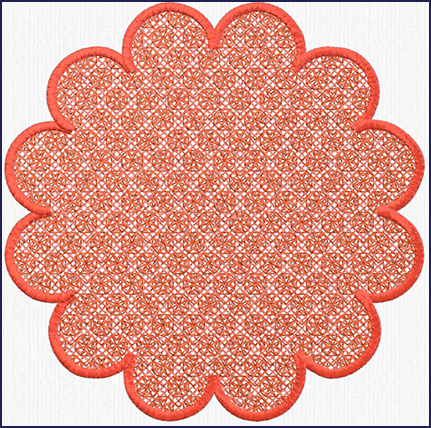
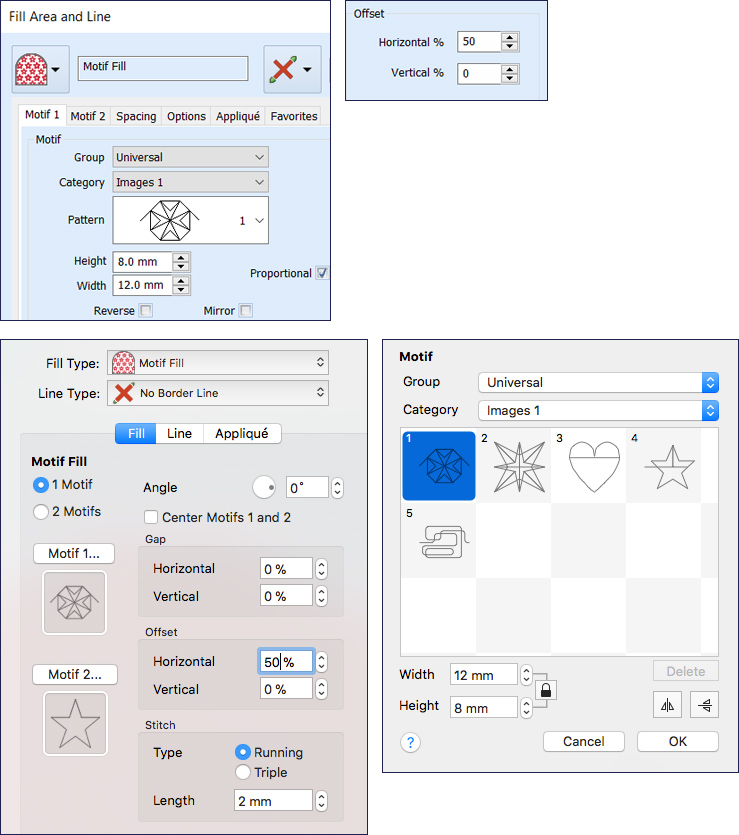
As shown, the additional fill layer's Motif Fill settings are Motif 1, Universal, Images 1, Spacing Offset Horizontal 50%.
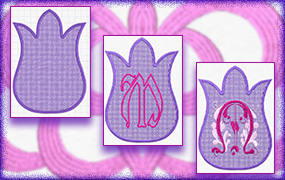
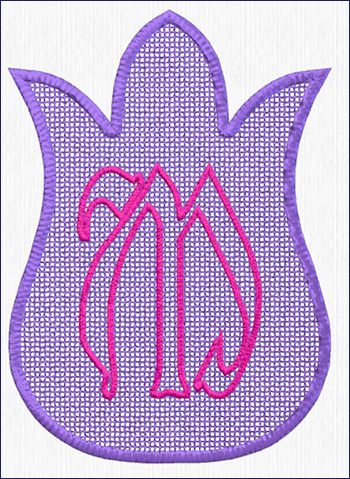
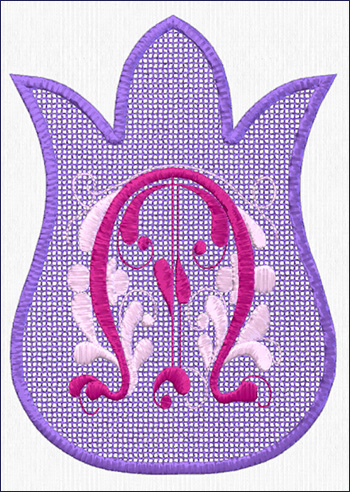
Who wouldn't love some free-standing lace with a monogram?
The embroidery below is designed with QuickCreate using Shape 36, Crosshatch Fill set to Square, Spacing/Gap set to 1.8mm, and Double Zigzag.
Add system fonts through the Home tab/Insert lettering command in Windows, or Edit/Insert/Insert Lettering in Mac. Choose from any of the system font letters to add a monogram on top of your lace base.
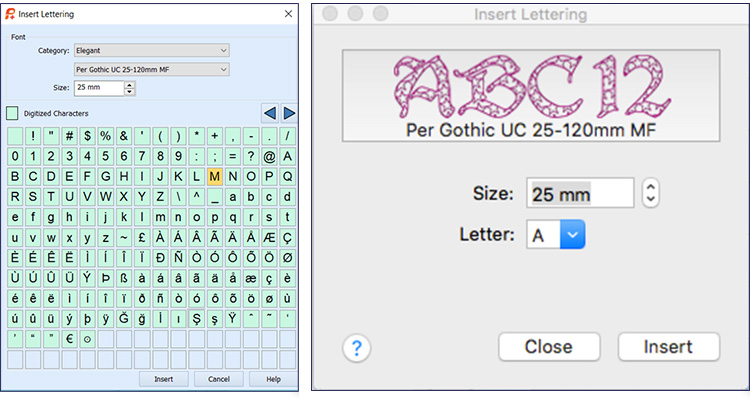
The Monogram shown below is Per Gothic UC 25-120mm MF, with the fill pattern removed, and a Satin Line border at 2mm Width, Density 5.
And here is the same lace base, topped with Curlique 2C UC – 40-80mm. The only adjustment is sizing the letter with the select box corner handles.
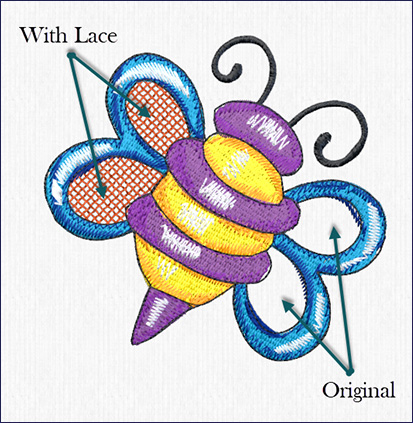
It is easy to insert lace into an existing embroidery. With the Insert Embroidery function, load an embroidery design, and then add areas of freestanding lace in Precise Create.
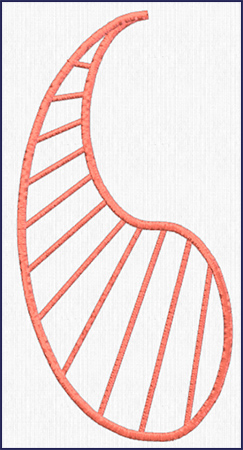
Settings for the lace wings in the bee, shown below, are Crosshatch Fill, Diamond, Gap/Spacing 2.0mm, and Double Zigzag.
The bee embroidery is from Premier+2|Samples|Premier+2Emb|Stitch2|Butterflies and Bugs.
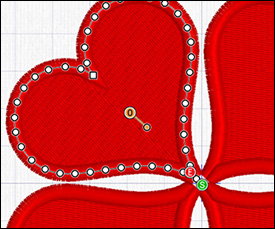
| The design pictured below is Premier+2|Samples|Premier+2Emb|Stitch2|Flowers|Scalloped Flower 1. |  |

The Satin Column objects are changed to a Satin Pattern 247 in the Gradients and Lace category. Richelieu Bar settings are Width 1.5, Density 4, Minimum Gap Size 7mm.
Add a little elegance to your life with the lace designing tools found in the PREMIER+™ 2 Create software! You’ll be amazed at all the unique new forms you can fashion.
Did you know...
... that you can click and drag a handle  to quickly and visually rotate Pattern Fills in PREMIER+™ 2
Create and on the Object tab in PREMIER+™ 2 Modify? Aligning stitches for multiple areas of Pattern Fills has never been faster or easier! to quickly and visually rotate Pattern Fills in PREMIER+™ 2
Create and on the Object tab in PREMIER+™ 2 Modify? Aligning stitches for multiple areas of Pattern Fills has never been faster or easier! |
 |
Have a fabulous day, from the software team at PREMIER+™ 2 Embroidery!
PS:
Join us next month as we experience creative techniques with PREMIER+™ 2 Sketch  in the PREMIER+™ 2 ULTRA system!