
PREMIER+™ 2 Software Newsletter - June 2018
Welcome to the PREMIER+™ 2 Newsletter. Check out our breaking information in News, then stick around for some inspiration!
Today's topic is Cross Stitcher: Perspective Correction  for Quick Cross and Importing Charts.
News
News

NEW PREMIER+™ 2 Learning Center
The PREMIER+™ 2 Learning Center has been enhanced with new videos, PDF tutorial exercises to follow, and links to older relevant tutorials.
Create a Phone Case Project-in-the-Hoop in PREMIER+™ 2 Embroidery Extra Windows Mac
Draw a cross stitch design with Multiply in PREMIER+™ 2 Cross Stitcher Windows Mac
Be sure to view those videos and follow the PDF instructions at our PREMIER+™ 2 Learning Center
Feature
Feature
Cross Stitcher: Perspective Correction for Quick Cross and Importing Charts
Adjust scanned images and charts with the NEW Perspective Correction feature,
added in the free 12.2 update for the PREMIER+™ 2 Embroidery system.
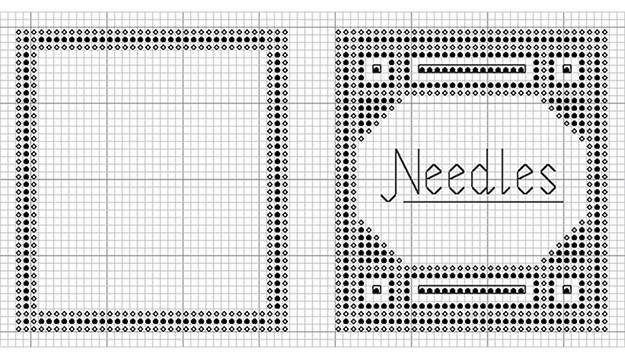
Scanning an image or photographing a picture to use as a background for Cross Stitcher is fast, but can result in skewing of the image rather than a nice, squared shape.
Whether you are loading a skewed image into the Windows Cross Stitch Wizard / Mac Cross Stitch Assistant,
or importing as a chart to build your own Cross Stitch design using the chart as a background, you will appreciate the precision and ease of use found with
Perspective Correction .
With the new Perspective Correction feature, it’s easy to select and adjust skewed pictures for a geometrically precise shape.
Simply click Perspective Correction in Rotate and Crop Picture to enable the adjustment handles,
then click a red corner on the Select Box to see the change in the Preview window.
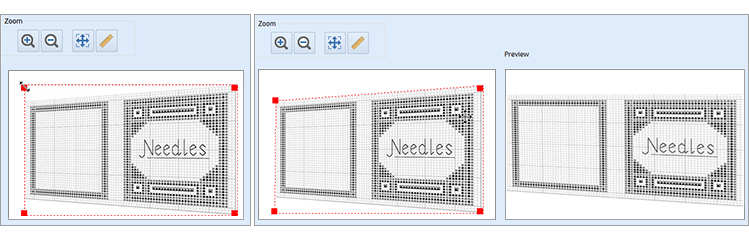
Use Stretch Picture to adjust the width-to-height ratio, too!

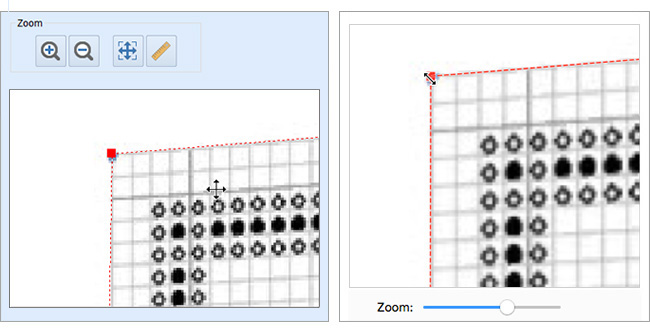
Don’t forget the Zoom tools! Adjust with Zoom to Rectangle  or Zoom to make sure those corners match exactly,
so your chart can be a perfect match to the grid when selecting Load Picture for a New Cross Stitch Design!
or Zoom to make sure those corners match exactly,
so your chart can be a perfect match to the grid when selecting Load Picture for a New Cross Stitch Design!
And when the image is adjusted to perfection, click
Save Picture  to
create a new picture file, so you can use it again without needing correction!
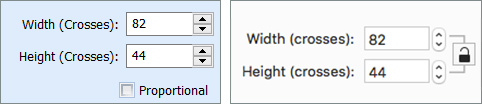
Mapping charts to exactly align with the Cross Stitcher grid overlay is super simple when you adjust the picture with
Perspective Correction , and then uncheck Proportional so you can type in the chart’s grids in Height and Width on the Design Size page.
to
create a new picture file, so you can use it again without needing correction!
Mapping charts to exactly align with the Cross Stitcher grid overlay is super simple when you adjust the picture with
Perspective Correction , and then uncheck Proportional so you can type in the chart’s grids in Height and Width on the Design Size page.
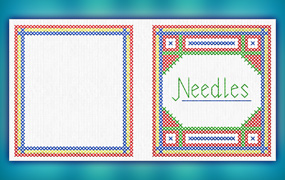 When a scanned picture is adjusted into a perfectly square chart,
matching the overlay grid to exactly match the chart picture means easy placement of crosses,
resulting in a very high quality (and well-shaped) finished embroidery, no 'handwork' necessary!
When a scanned picture is adjusted into a perfectly square chart,
matching the overlay grid to exactly match the chart picture means easy placement of crosses,
resulting in a very high quality (and well-shaped) finished embroidery, no 'handwork' necessary!
INSPIRATION
INSPIRATION

Artistic Effects with Perspective
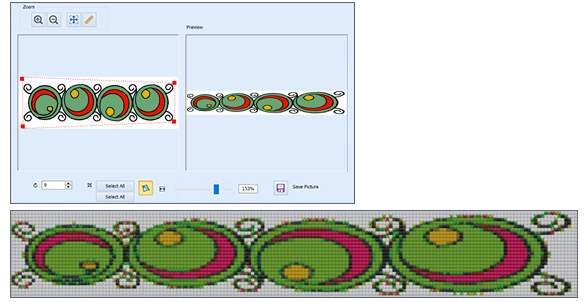
Sometimes, you want an artistic interpretation, rather than geometric precision.
Use Stretch Picture  to reshape images for a whole new style!
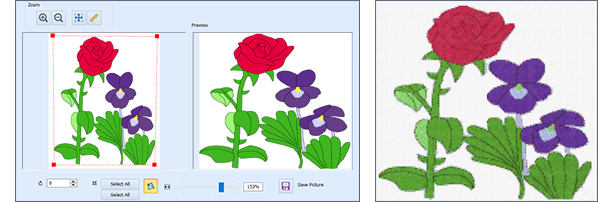
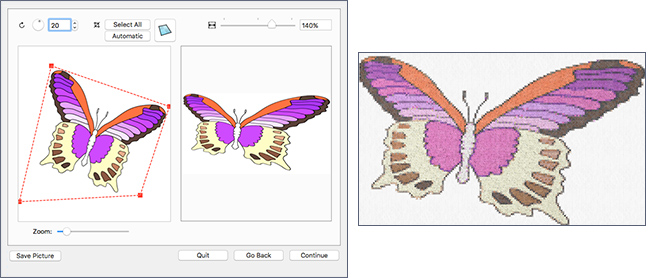
Adjust Perspective and Stretch Picture to give a butterfly lively wings!
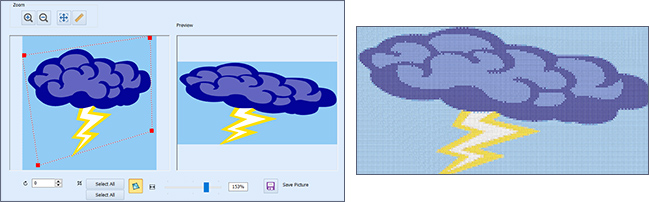
Or use the tools to intensify the storm.
Sometimes, you don’t need perfect geometry! Adjust Perspective and Stretch so you can create another point of view!
No matter how you twist the picture, the embroidery will always be something new!
Try out the new tools in Rotate and Crop Picture today! We’re sure you’ll love them just as much as we do!
Did you know...
...that picture size can affect the finished design when working with the ExpressDesign Wizard / Assistant?
Image size is best at 1500 pixels to 2000 pixels on the longest side.
Larger or smaller images are resized in the Wizard and may become irregular at the edges.
Have a fabulous day, from the software team at PREMIER+™ 2 Embroidery!
PS:
Join us next month as we discuss how to Export, Send, as well as Send to mySewnet™ and Send to Machine via mySewnet™!