
PREMIER+™ 2 Software Newsletter - January 2018
Welcome to the PREMIER+™ 2 Newsletter.
Check out our breaking information in News, then stick around for some inspiration!
Today’s topic is Project-in-the-Hoop  .
.
News
News

Happy New Year!
Happy New Year! We hope you had a wonderful holiday season and that you now have some "me-time" to use your embroidery software and machine.
View the new Mac and Windows videos in the Learning Center on using Import Font From Embroideries. Create a font from a set of embroidered letters, so you can place and align them easily.
Feature
Feature

Project-in-the-Hoop
When you need a special gift at the last minute, or just want to create a little ambiance in your life, try out the new Project-in-the-Hoop function, available in PREMIER+™ 2 EXTRA and PREMIER+™ 2 ULTRA!
Wizards and Assistants streamline the creation process when you design embroidery projects in the PREMIER+™ 2 Embroidery System in Windows® and on Mac®.
Project-in-the-Hoop features several Category selections, and each Category has its own Style choices.
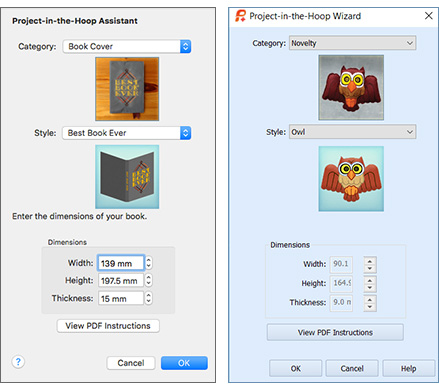
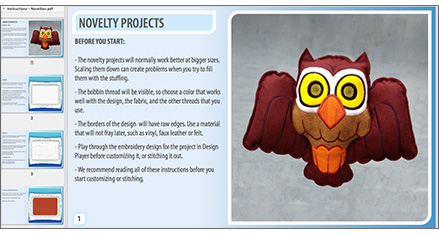
The PDF Instructions for each Category contain general steps for completing all projects in that Category.
Just click the View PDF Instructions button to view the PDF on your computer as you design your Project-in-the-Hoop. You can also transfer the PDF file to a tablet or e-reader if you prefer to scroll through the document by your side as you stitch the project, or print the PFD file to create a paper guide to keep at hand during project construction.
Projects-in-the-Hoop are fast, fun and functional!
Project-in-the-Hoop designs contain several layers of embroideries, placed together in a specific alignment and stitching sequence, with built-in commands that prompt you to place or trim fabrics. The designs are initially held together as a selection, indicated by the orange handles visible on the select box.

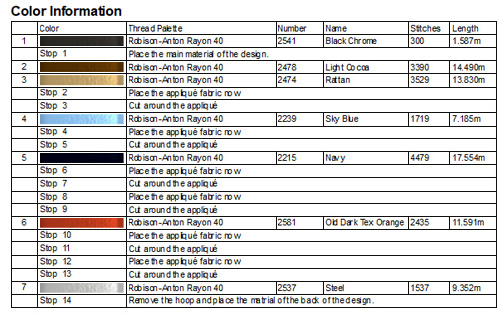
When you select File | Print to print a worksheet, the Color Information table has the steps for each thread color and any additional commands used to assist you as you stitch the embroidery.
INSPIRATION
INSPIRATION
One Project-in-the-Hoop Category, Many Variations
Many Project-in-the-Hoop Styles have elements that are adjustable.
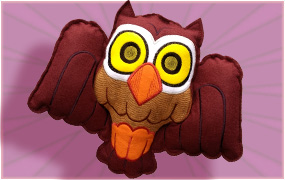
The Owl from the Novelty Category uses a special MultiWave Fill object in his body, so you can edit the fill to personalize your project.
Tools in the Home tab help you quickly select the design layer that has the Owl’s body,
using Previous  or Next Design
  (on the Mac, choose Edit > Previous Design, or Edit > Next Design).
If the design is Grouped, use Restrict Groups (  or
or  ) to move between sections.
Use right-click (or Control-click on Mac) to select the MultiWave Fill properties.
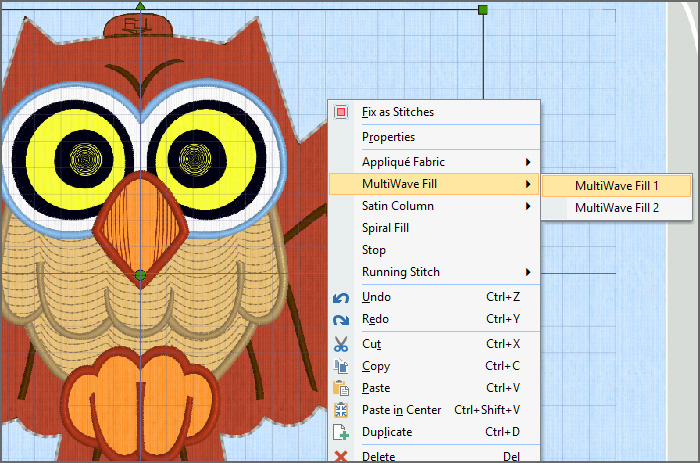
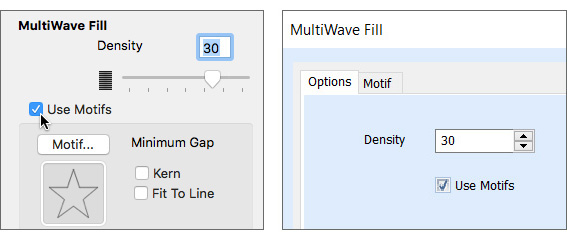
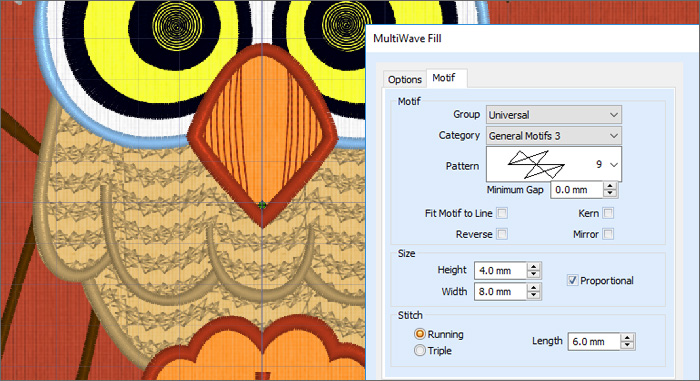
When you enable Use Motifs, the Motif tab or window offers up a multitude of stitch choices for nearly limitless variations in texture to personalize your Project-in-the-Hoop!
However, design options aren’t limited to adjusting properties!
Use the Letter panel to give your owl a monogram!

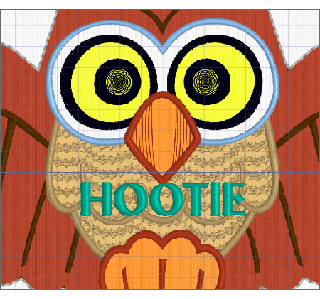
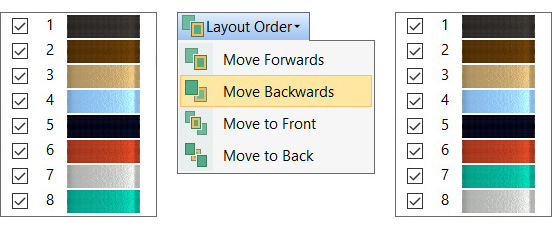
The Letters are added at the end of the embroidery, but you can use Layout Order in the Home tab (on Mac, Design > Layout Order > Move Forwards, or Design > Layout Order > Move Backwards) to adjust them into the correct stitching sequence so your Owl will still stitch properly!
And, in PREMIER+™ 2 Create and PREMIER+™ 2 Modify, you can design and adjust your own elements to personalize your Owl’s character even more!

Take a few moments to play with our wise Owl today, and learn some of the new features that make PREMIER+™ 2 Embroidery software such fun!
Did you know...
... you can use some shortcuts to access tools quickly?
| Mac | Windows | |
|---|---|---|
| Previous Design | ⌘← | Shift+Tab |
| Next Design | ⌘→ | Tab |
| Move Forwards | ⌘F | Alt, H, B, F |
| Move Backwards | ⌘B | Alt, H, B, B |
In Mac, view the shortcuts on the menus. In Windows use the shortcut on the tooltip, or press the Alt key and then press the suggested letter keys for the tab and tool.
Have a fabulous day, from the software team at PREMIER+™ 2 Embroidery!