
PREMIER+™ 2 Software Newsletter - February 2018
Welcome to the PREMIER+™ 2 Newsletter.
Check out our breaking information in News, then stick around for some inspiration!
Today's topic is the ExpressDesign Wizard (Windows  ), and the ExpressDesign Assistant (Mac) in PREMIER+™ 2 Embroidery Extra.
News
News
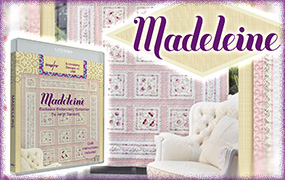
MADELEINE embroidery quilt collection
Have you seen the video about MADELEINE, the new inspira™ exclusive embroidery quilt collection by Janet Sansom?
Click here to check it out.
Mac® Update
If you are using Mac®, we strongly advise you to update to PREMIER+™ 2 Embroidery System version 12.1.1 using Smart Update.For more information please view FAQ CC010.
Feature
Feature
The ExpressDesign Wizard and Assistant
The ExpressDesign feature in PREMIER+™ 2 Embroidery Extra has tools for transforming graphic art into embroidery stitches.
You can choose to create embroidery sized to a specific hoop 'Express Design Into Hoop'  ,
or to a specific area of the hoop 'Express Design Into Rectangle'
,
or to a specific area of the hoop 'Express Design Into Rectangle'  .
.
The ExpressDesign Wizard and Assistant offer several design types.
|
 |
Easy steps guide you through the rest of the design process
Load a Picture  ('Select a Picture' in Mac) uses many types of graphic artwork,
directly from your computer or any device connected to your computer, such as a USB stick or external drive! You can even scan images from paper.
('Select a Picture' in Mac) uses many types of graphic artwork,
directly from your computer or any device connected to your computer, such as a USB stick or external drive! You can even scan images from paper.
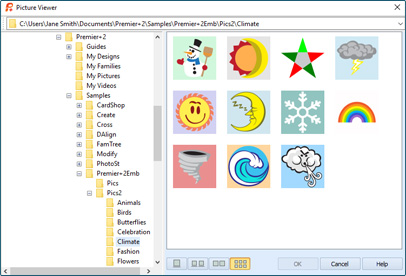
Graphics pictured are from the Sample folders in the Premier+2 Documents folder.
Then, adjust the image as desired.

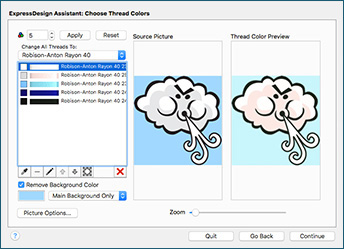
Image from the folder Premier+ 2|Premier+2Emb|Pics2|Climate.
Multiple tools help you adjust the artwork, including Rotate to adjust the picture's angle, a crop area to select partial areas of the image, and Zoom tools that help you closely inspect your selection.
You can easily select a thread brand or color palette, or adjust individual colors within your designs!
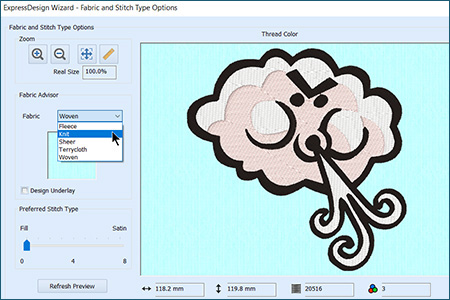
And, with the handy Fabric and Stitch Options, you can automatically adjust stitch density, underlay settings, and stitch compensation for the push and pull of stitches on different fabric types! It's a snap to individualize embroideries automatically to the type of project you plan to stitch.
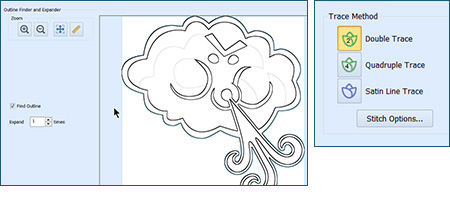
Other design types such as Trace and Border have additional tools to further refine the artwork or define the stitching options.
INSPIRATION
INSPIRATION
Inspired Designs with ExpressDesign
Many options are available to define your embroideries made with the ExpressDesign feature. How many ways can you find to make custom embroideries as you work your way through all those choices? Here are a few ideas you can try!
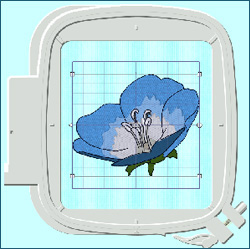
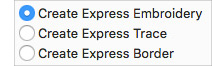
To fill a selected Hoop  with embroidery, select the ExpressDesign Wizard (Windows) or Assistant (Mac), and then choose ExpressDesign into Hoop.
Select Create Express Embroidery and follow the steps to generate a filled embroidery design maximized to the largest dimension of your selected hoop.
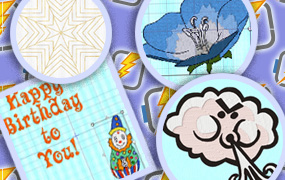
The flower image is found in REMIER+ 2| Premier+2Emb|Pics2|Flowers.
with embroidery, select the ExpressDesign Wizard (Windows) or Assistant (Mac), and then choose ExpressDesign into Hoop.
Select Create Express Embroidery and follow the steps to generate a filled embroidery design maximized to the largest dimension of your selected hoop.
The flower image is found in REMIER+ 2| Premier+2Emb|Pics2|Flowers.
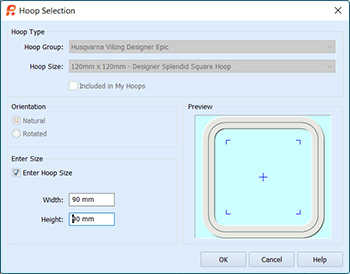
Tip: Change the Hoop Size and set a specific Width and Height to limit the max size when you need something in a very specific size range!
Try adding small design elements to quilt label designs or other blocks of text. To make new elements to enhance a work already in process, select the ExpressDesign Wizard or Assistant, and then choose ExpressDesign into Rectangle.
All you do is click and drag a box in the area you want to place the design, and then follow the Wizard or Assistant to select your embroidery options.
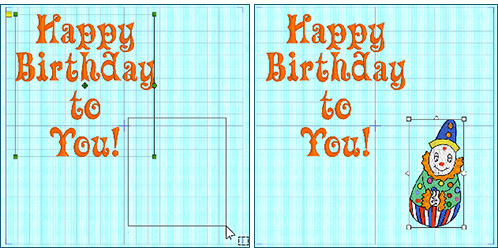
The Clown image is found in PREMIER+ 2|Premier+2Emb|Pics2|Toys.
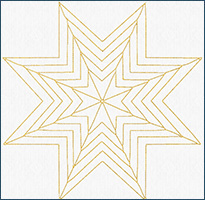
Redwork embroidery is very easily designed using ExpressDesign. Select the ExpressDesign Wizard or Assistant, ExpressDesign into Hoop, and Create Express Trace. The star image is found in PREMIER+ 2|Premier+2Emb|Pics2|Geometrics.
Follow through the Wizard or Assistant to select clipart and find its outlines.
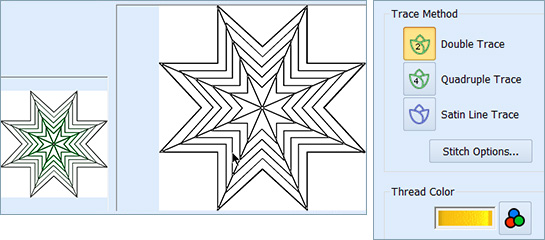
You'll be able to choose from several stitch types, and change thread colors from more than 21,800 different threads from 39 different manufacturers!
When you Finish, your redwork design is ready to go!
Don't forget about Create Express Border!
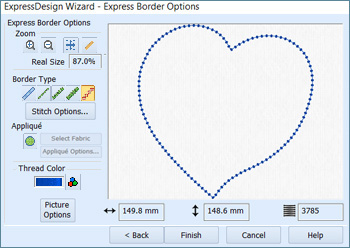
Select a simple shape, find the outline, and then select a stitch in Border Type. The heart is found in PREMIER+ 2| Premier+2Emb|Pics2|Celebration.
You have five line type stitches from which to choose, including the decorative motif stitches, as shown! The stitch pictured is Group: Universal, Category: Candlewicking 1, and Stitch 1.
You can click the Appliqué function on or off. 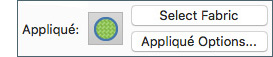
When Appliqué is on, select your favorite fabric from the sample files, or even scan in your own.
|
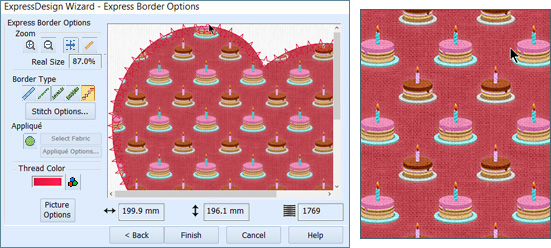
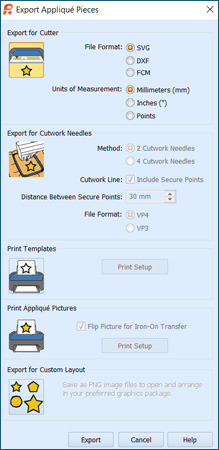
And when the Appliqué embroidery is done, use Export Appliqué Pieces to pre-cut your fabric on an electronic cutting machine, or print a paper template to cut by hand! ExpressDesign can get you up and sewing quickly and get you inspired to try new and innovative projects! Take a little time to play today. You'll be amazed at just how much you can accomplish when you have a little help from a Wizard or Assistant! |
|
Did you know...
… that the Help page in every PREMIER+™ 2 Module (or Application in the Mac version) has a link to the Internet FAQ, where you can type in questions to search for help with frequently asked questions?
Have a fabulous day, from the software team at PREMIER+™ 2 Embroidery!
PS:
Join us next month as we explore Bezier Curves in PREMIER+™ 2 Create.