
Premier+™ Software Newsletter - October 2016
Welcome to the Premier+™ Newsletter. This month we will look at the different functions of Paste in the Premier+™ Modify module, working with layers in Premier+™ Modify to assist in design placement, and the Gradient / Density controls for Satin Stitches in Premier+™ Embroidery software.
Inspired Icons
Inspired Icons
In Premier+™ Embroidery, finalized embroideries copied to the clipboard become available in other modules that utilize their file type.
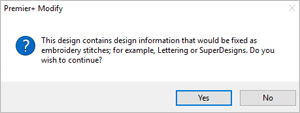
For example, an active SuperDesign made in the Premier+™ Embroidery module can be copied and pasted into the Premier+™ Modify module,
although you'll be prompted to Fix as Embroidery Stitches when you Paste.
 However, Paste has multiple functions in the Modify module! Let's look at what each Paste function can do.
Paste
However, Paste has multiple functions in the Modify module! Let's look at what each Paste function can do.
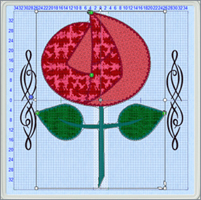
Paste ![]() adds the stitches from the Clipboard Viewer to the end of visible stitches in the Modify module.
Pasted stitches are initially surrounded by a select box.
Use Paste to quickly place an embroidery into the Modify module, or to add additional embroidery stitches into a work in progress.
adds the stitches from the Clipboard Viewer to the end of visible stitches in the Modify module.
Pasted stitches are initially surrounded by a select box.
Use Paste to quickly place an embroidery into the Modify module, or to add additional embroidery stitches into a work in progress.
 Paste as Design
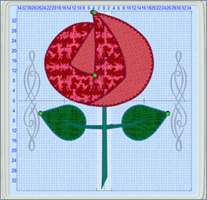
 ![]() places stitches from the Clipboard Viewer into the Work Area as a new layer of stitches,
so they are not initially merged with existing stitches.
Working with Layers lets us easily edit individual designs within the work in progress, yet view the design as a whole, since inactive layers are still visible in Automatic Ghost Mode.
places stitches from the Clipboard Viewer into the Work Area as a new layer of stitches,
so they are not initially merged with existing stitches.
Working with Layers lets us easily edit individual designs within the work in progress, yet view the design as a whole, since inactive layers are still visible in Automatic Ghost Mode.
 Paste into New Window
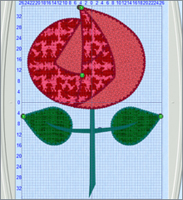
 ![]() opens a new Work Area within the Modify module. Individual tabs appear at the lower left corner of the Work Area, and the active tab is highlighted
opens a new Work Area within the Modify module. Individual tabs appear at the lower left corner of the Work Area, and the active tab is highlighted  .
Use Paste into New Window to work on an individual project, or to select portions of another embroidery to paste into a work in progress.
.
Use Paste into New Window to work on an individual project, or to select portions of another embroidery to paste into a work in progress.
Module Mystique
Module Mystique

Working with multiple designs as Layers in the Premier+™ Modify module enriches the design editing process, since you can use the advanced editing tools in Modify while keeping designs as separate units (Layers), similar to the Premier+ Embroidery module.
 Designs may be layered using Insert
 ![]() or Paste as Design
or Paste as Design ![]() .
When you use the Drag and Drop method of opening an embroidery,
double-click from the Windows File Manager or Windows Explorer, or use the Open
.
When you use the Drag and Drop method of opening an embroidery,
double-click from the Windows File Manager or Windows Explorer, or use the Open  command, stitches merge or combine into the existing work rather than retaining separate layers.
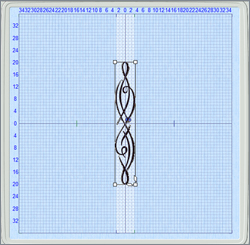
The first embroidery loaded into Modify has a temporary select box for ease of adjusting the design's position or orientation.
All stitches are active for editing with the tools in Modify.
command, stitches merge or combine into the existing work rather than retaining separate layers.
The first embroidery loaded into Modify has a temporary select box for ease of adjusting the design's position or orientation.
All stitches are active for editing with the tools in Modify.
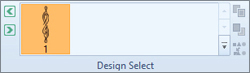 In the Home tab, the Design Select window displays one embroidery design.
 When you Copy
 ![]() and then Paste As Design,
or Insert
and then Paste As Design,
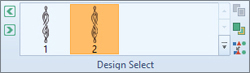
or Insert ![]() an additional embroidery design, the new embroidery is placed as an additional individual layer.
Two embroidery designs are now visible in the Design Select window.
an additional embroidery design, the new embroidery is placed as an additional individual layer.
Two embroidery designs are now visible in the Design Select window.
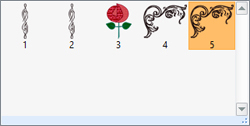
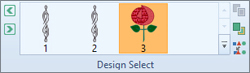 Each additional embroidery design added with Paste as Design or Insert adds another individual
layer in the Work Area, visible as additional designs in the Design Select Window. Designs are numbered in the order they stitch, with the lowest numbered design at the back (or beginning) of the embroidery,
and the highest numbered at the front (or end) of the embroidery.
Each additional embroidery design added with Paste as Design or Insert adds another individual
layer in the Work Area, visible as additional designs in the Design Select Window. Designs are numbered in the order they stitch, with the lowest numbered design at the back (or beginning) of the embroidery,
and the highest numbered at the front (or end) of the embroidery.
Previous Design ![]() and Next Design
and Next Design ![]() step you through the individual layers of embroideries. When two or more layered embroideries are available, additional tools help you
Move Forwards
step you through the individual layers of embroideries. When two or more layered embroideries are available, additional tools help you
Move Forwards ![]() (stitch later in the embroidery) ,
Move Backwards
(stitch later in the embroidery) ,
Move Backwards ![]() (stitch earlier in the embroidery) , or merge individual elements together with Combine with Previous
(stitch earlier in the embroidery) , or merge individual elements together with Combine with Previous ![]() .
.
 When you load more designs than can be displayed in the Design Select window, use the Gallery View
  to see all available designs.
Save ![]() or Save As
or Save As ![]() utilizes the .vp4 format, and saves as a Grouped but not finalized or merged embroidery.
Export Embroidery
utilizes the .vp4 format, and saves as a Grouped but not finalized or merged embroidery.
Export Embroidery ![]() merges and finalizes (flattens) stitches using your selections in Optimize Embroidery, to ready the design for your embroidery machine.
merges and finalizes (flattens) stitches using your selections in Optimize Embroidery, to ready the design for your embroidery machine.
Tips and Techniques
Tips and Techniques
Have you ever worked with very long Satin stitches, perhaps when creating monograms in Premier+™ Embroidery's Lettering, satin stitch elements in SuperDesigns, or satin elements in Premier+™ Create or Premier+™ Modify? Long satin stitches tend to catch and snag, and can sometimes appear rather bland.
Let's explore ways to jazz up your satin stitches by adjusting Pattern and/or Gradient settings. The Pattern and Gradient editing tools work very similarly wherever they are available in the Premier+™ software. Some elements that can be adjusted include Letters, SuperDesigns, Object Edit in Modify, and Satin tools in Create. Satin Column or Satin Area properties can be adjusted before or after you create stitches with these tools.
 Let's examine how to adjust Satin properties in Premier+™ Embroidery's Lettering.
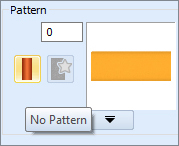
When you open the properties dialogue box, Satin stitch properties are initially set at No Pattern.
Let's examine how to adjust Satin properties in Premier+™ Embroidery's Lettering.
When you open the properties dialogue box, Satin stitch properties are initially set at No Pattern.
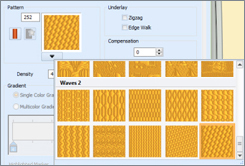 Select the Gallery View
  and scroll to browse and select a new Pattern
from more than 250 system patterns. Other Pattern settings vary according to the type of Satin stitches, and may include settings for Density and Underlay.
and scroll to browse and select a new Pattern
from more than 250 system patterns. Other Pattern settings vary according to the type of Satin stitches, and may include settings for Density and Underlay.
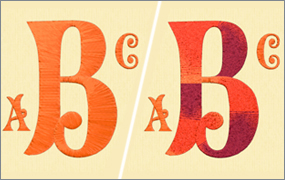
To enable Gradient properties, check the box beside Gradient. Choices include Single Color Gradient for distributing stitches at higher and lower levels of density (think thick and thin stitch areas),
and Multicolor Gradient for blending multiple colors of threads through the satin stitch area. Gradient may be used with satin (no pattern) or satin pattern fills.

Patterns and Gradients are shaped to the curvature of the Satin stitches, producing unique visual and tactile textures in your embroideries!
Fun Facts to Know and Tell
Did you know that changing the Density setting of Gradient Fills inversely adjusts the stitch count of the Fill area? For example, a higher Density number produces fewer stitches, as increasing the Density number increases the spacing between lines of stitches in the Gradient Fill.
Best wishes from Premier+™
PS: Watch for the Premier+™ newsletter next month as we look at Break Up Stitches in the Premier+™ Modify module, how to Flip, Rotate or Skew selections in Modify, and what Reverse Order in Modify can do when stitching multiple identical design elements in Exported embroideries.