
Premier+™ Software Newsletter - August 2016
Welcome to the Premier+TM Newsletter. This month we will look at the Rename Database Icon in Premier+TM Thread Cache; at many types of files that may be inserted in Premier+TM Create; and at the different ways of Grouping embroideries.
Inspired Icons
Inspired Icons
You can easily create multiple My Thread Databases in the Premier+TM Thread Cache module.
Have you ever incorrectly typed the new name? Or changed your mind later about the name you used?
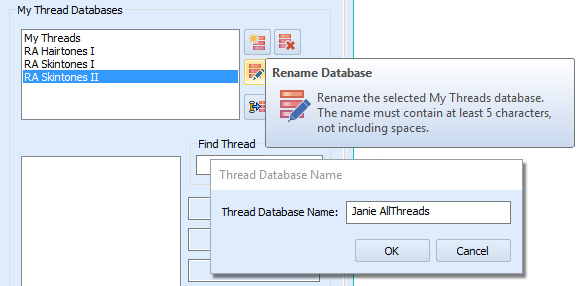
Use the Rename Database Icon ![]() to quickly change the name of one of your My Thread Databases.
to quickly change the name of one of your My Thread Databases.
It’s easy to use the Rename Database feature. Simply click the Rename Database Icon ![]() under the
My Thread Databases tab to open the Thread Database Name field, and then edit or type in a new name.
When you click OK you’ll update the information!
under the
My Thread Databases tab to open the Thread Database Name field, and then edit or type in a new name.
When you click OK you’ll update the information!
Module Mystique
Module Mystique
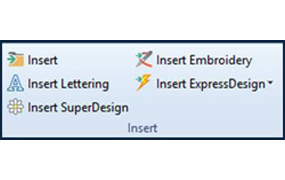
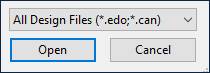
Premier+TM Create offers many options for inserting different types of design files so you can work with their properties in the .edo format.
The Insert icon ![]() adds .edo files, the default design format for Premier+TM Create, to your existing project.
adds .edo files, the default design format for Premier+TM Create, to your existing project.
The Insert icon ![]() also adds the .can format of digitizing files from previous versions of software.
also adds the .can format of digitizing files from previous versions of software.
 Insert Lettering
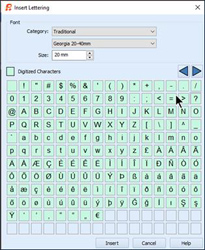
 ![]() gives you access to the Premier+TM System Fonts and their characters from the Letter tab in Premier+TM Embroidery,
including any fonts you have created with the QuickFont Wizard. Add words or names to your embroideries, character by character, by selecting the Category,
Font and initial size, so you no longer need to manually digitize characters in logo embroideries. Shape and adjust the letters’ properties as desired within the .edo
file, and you’ll have those specialized fonts on their way to perfection for any business logo in no time!
gives you access to the Premier+TM System Fonts and their characters from the Letter tab in Premier+TM Embroidery,
including any fonts you have created with the QuickFont Wizard. Add words or names to your embroideries, character by character, by selecting the Category,
Font and initial size, so you no longer need to manually digitize characters in logo embroideries. Shape and adjust the letters’ properties as desired within the .edo
file, and you’ll have those specialized fonts on their way to perfection for any business logo in no time!
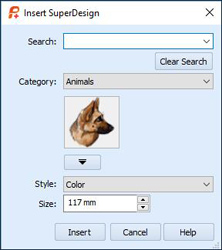
Insert SuperDesign ![]() gives access to the Premier+TM SuperDesigns. Select a Category, and open the viewer to browse and select designs.
Select the Style and an initial size, and click Insert to add the selected SuperDesign to your work in progress!
gives access to the Premier+TM SuperDesigns. Select a Category, and open the viewer to browse and select designs.
Select the Style and an initial size, and click Insert to add the selected SuperDesign to your work in progress!
Use Insert Embroidery ![]() to add most types of finalized embroidery design files to your Premier+ Create project in progress.
The stitches in the embroidery are converted into .edo stitch objects and grouped into a block. Select elements within the group to edit,
add additional objects, or work with the Group to mirror, rotate, and more.
to add most types of finalized embroidery design files to your Premier+ Create project in progress.
The stitches in the embroidery are converted into .edo stitch objects and grouped into a block. Select elements within the group to edit,
add additional objects, or work with the Group to mirror, rotate, and more.

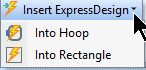
With Insert ExpressDesign ![]() , you can create a new embroidery in the work area, or add an embroidery to an existing work-in-progress via the ExpressDesign Wizard.
Size the Design to the entire hoop or to a rectangular area you specify, and step through the Wizard to add the design elements to your existing .edo file!
, you can create a new embroidery in the work area, or add an embroidery to an existing work-in-progress via the ExpressDesign Wizard.
Size the Design to the entire hoop or to a rectangular area you specify, and step through the Wizard to add the design elements to your existing .edo file!
Tips and Techniques
Tips and Techniques
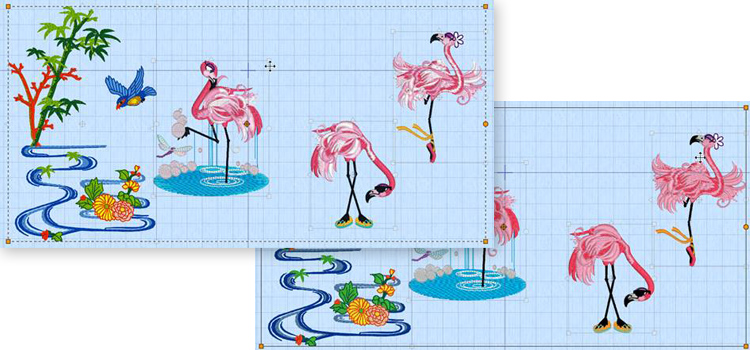
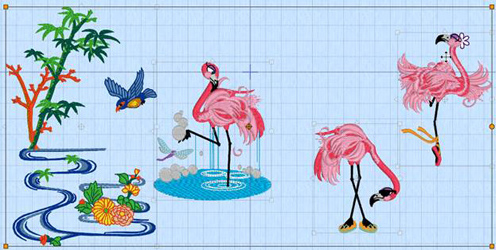
Have you wondered why Groups sometimes appear and behave differently in Premier+TM Embroidery? When multiple designs are selected at the same time, they become temporarily grouped with a select box. The box has orange corners connected by dashed lines. If they are permanently grouped the lines are solid.
Dashed lines indicate the designs are temporarily grouped because they are all selected. Individual designs appear ‘ghosted’ with their select boxes faintly visible. The selected “group” of designs can be moved as a unit, mirrored, rotated, centered in the hoop, and Resized proportionally (when the Resize function is selected). You can also use Color Tone to change all threads at one time. You cannot select an individual design within the temporary grouping. If you click outside the select box, the designs are all deselected and appear as individual designs.
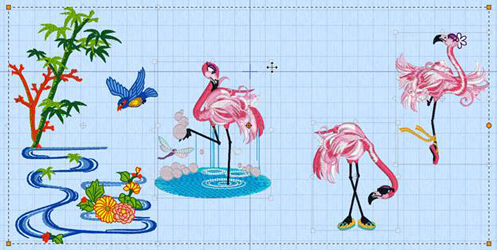
When multiple designs are selected and then Grouped ![]() in the Home tab, the select box changes to have orange corners with solid outlines.
The Group becomes semi-permanent, so you can click outside it and the designs are still bound together. You can Group a portion of designs in a work area
to lock their position, and yet continue to adjust and position other embroideries as you customize your layout!
in the Home tab, the select box changes to have orange corners with solid outlines.
The Group becomes semi-permanent, so you can click outside it and the designs are still bound together. You can Group a portion of designs in a work area
to lock their position, and yet continue to adjust and position other embroideries as you customize your layout!
Restrict Groups is a toggle to ![]() temporarily unlock the group so you can select and adjust individual designs without changing the other elements in the grouping,
or relock them together. Ungroup
temporarily unlock the group so you can select and adjust individual designs without changing the other elements in the grouping,
or relock them together. Ungroup ![]() will unlock a group of designs so they are once again individual for adjusting.
will unlock a group of designs so they are once again individual for adjusting.
Fun Facts to Know and Tell
Did you know that Grouped designs (temporarily or semi-permanently Grouped) can be centered in the hoop while retaining their relative positions in the grouping?
Best wishes from Premier+™
PS: Watch for the Premier+TM newsletter next month as we look at the Alignment tools in Premier+TM Embroidery, and the Lace tools in Premier+TM Create.