
Inspired Icons
Inspired Icons
Draw Range has been a feature of our embroidery software for quite some time now. In 6D™ and 5D™ Embroidery Extra the draw Start and End slider bars, found on the Edit tab, provide a very powerful way of viewing an embroidery and understanding exactly how it is formed.
They allow you to progress forwards and/or backwards through an embroidery stitch by stitch, and isolate a specific sequence of stitches. You can select the visible stitches, without affecting the hidden stitches. This comes in very handy when sections of stitches are quite close together.
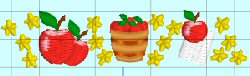
For example, you may decide there are just too many stars in this design.
Use the draw start and end slider bars to isolate the bottom two middle stars.


After isolating the stars, simply click Make Block from Visible Area  , then
Delete
, then
Delete  to eliminate those two stars. Imagine how hard that would have been to do without the draw range slider bars!
The Draw Range bars work in the following ways:
- Click and drag the slider box along the slider bar.
- Click the + or - at the side of the slider bar to add or subtract one stitch at a time. Click and hold on the + or - to progress more rapidly.
- Click in the space on the slider bar on either side of the slider box to move in that direction and jump through the stitches rapidly. You can also click and hold, but the slider box will stop when it reaches the end.

In 6D™ and 5D™ Stitch Editor Plus or 5D™ Stitch Editor you have these controls, in addition to many more options.
Module Mystique
Module Mystique

This month we will look at the ExpressDesign Wizard found in Embroidery Extra. This wizard has been in our software since wizards were introduced in the 4D™ Embroidery System. In particular, we will look at how to create an appliqué using the Border option.
The Wizard gets interesting once you get to the Express Border Options page. Click on Border Options to select the type of stitching used for the borders, and to choose the thread color. When Appliqué is selected, the preview shows where the appliqué fabric should be placed.
After selecting Appliqué, click the Options button to show the properties for Appliqué. If desired, adjust the properties and click OK. Set Density from 2 to 15. The lower the number, the closer together the stitches and the more stitches are produced. The initial setting is 4.
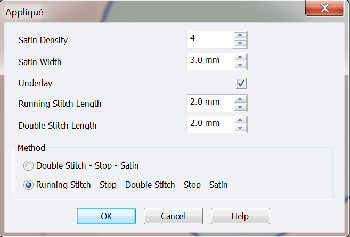
Set Width for satin border from 1 to 12mm in steps of 0.1mm. The initial setting is 2.0mm. You may prefer a little wider satin border to make sure the edges of the fabric are caught in the satin. Use this option to place edge walk underlay inside each edge of the satin border. Underlay will not be placed if the Border Width is set below 2mm.
Set the length of running stitch used for the placement outline in the second appliqué method, from 1 to 6mm in 0.1mm steps. The initial setting is 2.0mm. Set the length of double stitch used to stitch down the appliqué fabric, from 1 to 6mm in 0.1mm steps. The initial setting is 2.0mm.
Choose between Double Stitch - Stop - Satin and Running Stitch - Stop - Double Stitch - Stop - Satin for your appliqué method. In the first appliqué method, before starting to stitch, place your appliqué layer in position, stitch it down with double stitch then the machine will stop automatically. Trim the appliqué, then finish the edges with satin border. In the second appliqué method, a running stitch outline is stitched first that shows where the appliqué layer should be positioned, then the machine stops automatically. Position the appliqué layer and stitch it down with double stitch, stop and trim. Then finish the edges with satin border.
Technique Tune-Up
Technique Tune-Up
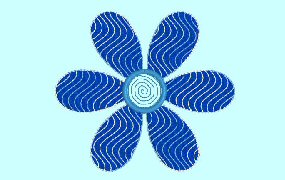
You can add MultiWave fill areas to your designs in Design Creator to make a unique creation. This feature is available both in the 6D™ Embroidery System and the 5D™ Embroidery System. MultiWave fill adds three-dimensional effects to your embroidery designs.

Place a line, or lines, to position the stitch lines in an embroidery. The lines do not have to be within the fill area; however they should not cross each other.
Vary the density or use a motif to change the effect. If you fill an area of a design with the MultiWave fill  , this is the default pattern.

If you want to change the "wave", use Freehand Point Wave Line  or
Freehand Tablet Wave Line
or
Freehand Tablet Wave Line  to form
a line that shapes the wave patterns in a MultiWave fill.
to form
a line that shapes the wave patterns in a MultiWave fill.
You can create an interesting effect by adding a MultiWave fill on top of a standard Pattern fill, as shown in the design at the beginning of this section.
 QuiltDesign Creator
QuiltDesign Creator
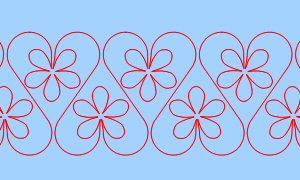
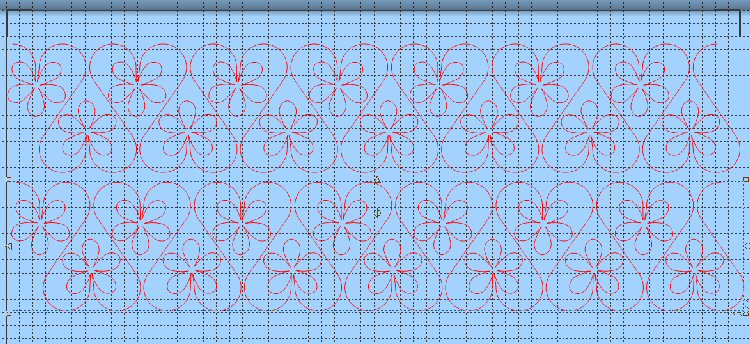
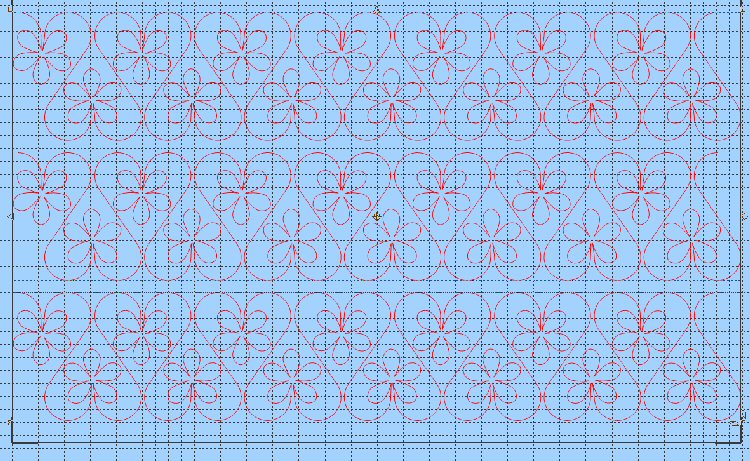
This month we will see how to use the Alignment tools, which help you adjust the spacing between rows in an continuous line design.
After you have created one repeat, such as the one pictured, Encore  it, then size it to fit the width of your quilt.
Move the continuous line design to the top of your quilt area. Group this row, then duplicate  . Move below the first row.
Select All
. Move below the first row.
Select All  , then click on the drop- down arrow next to
Center in Design Area
, then click on the drop- down arrow next to
Center in Design Area  , then click on Align Left
  .. The second row will snap into alignment with the row above.
Add a third row and repeat the Align Left . Then click the drop-down arrow next to
Center in Design Area . This time, click on Distribute Vertically  .
The middle row will shift so there is as much space between the first two rows as there is between the second and third row. All three rows are now aligned on the left and evenly spaced.
.
The middle row will shift so there is as much space between the first two rows as there is between the second and third row. All three rows are now aligned on the left and evenly spaced.
Fun Facts to Know and Tell
Did you know that you can reverse the stitchout direction of satin columns or lines in Design Creator using the Reversal options on the Object Menu?
Best wishes from 6D™
P.S. Watch for the 6D™ newsletter next month as we look at the Color Select Tools, creating lace, Cross Stitch lettering and Snap to Grid in QuiltDesign Creator.

VANTAGE™ Embroidery Software Support is a membership program which provides education and support of the HUSQVARNA VIKING® & PFAFF 6D™ and 5D™ Embroidery Systems, QuiltDesign Creator, TruEmbroidery™ 3 and TruEmbroidery™ Software for Mac® computers. The VANTAGE™ program is currently available in the US, Canada, and Australia. Please visit your authorized HUSQVARNA VIKING® or PFAFF® dealer to learn more and sign up today.