
Inspired Icons
Inspired Icons
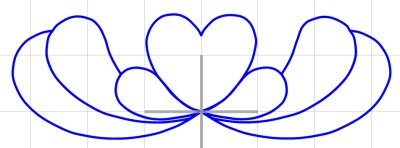
The Knife tool in the Draw Window of 6D™ and 5D™ Design Creator can be used to alter existing drawings by cutting a line, shape or group into two or more parts. For example, with this Feather MiniPic we can remove the bottom heart to create a new drawing.
Select the design by clicking on it, and then select the Knife tool. Left-click where each of the red arrows is shown on the diagram, then right-click to complete the function. You should now have two objects in the Filmstrip. Select the bottom heart, then delete it.
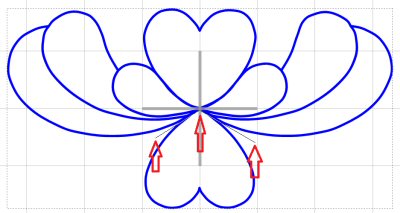
You may need to clean up a few stray nodes. You can now create your new design with the Send to Wizard tool or go directly to the Design tab to create it manually, using the Freehand functions.
The Knife tool was added in 5D™ Design Creator, together with the other vector drawing capabilities in the Draw window.
Module Mystique
Module Mystique
The Border feature, with more options than in Embroidery Extra, is a part of Stitch Editor on the Modify tab in the 6D™, 5D™, and 4D™ Embroidery Systems. Choose whether you wish to create an External Border, an Internal Border, or an Overlay Border.
The External option removes any stitches outside the border. Internal Border removes all stitches inside the border. Overlay places the border on top, removing no stitches.
In the 6D™ and 5D™ Stitch Editor Plus modules there are three methods to draw your border: Freehand Tablet Border  ,
Freehand Point Border
,
Freehand Point Border  and Draw Border Shape
  .
In the 5D™ and 4D™ Stitch Editor modules there are two methods: Polygon
.
In the 5D™ and 4D™ Stitch Editor modules there are two methods: Polygon  or Draw Border Shape
  .
There are 75 border shapes to choose from in 6D™, and 50 to choose
from in the 5D™ and 4D™ Embroidery Systems.
.
There are 75 border shapes to choose from in 6D™, and 50 to choose
from in the 5D™ and 4D™ Embroidery Systems.
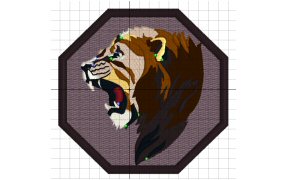
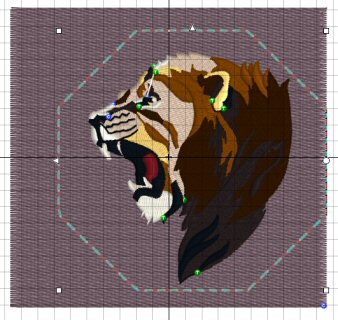
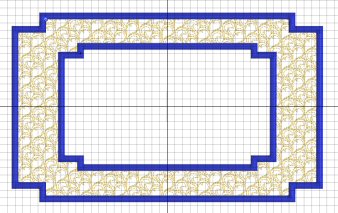
To use Draw Border Shape, select the shape you want from the drop down menu. Click Draw Border Shape then click and drag around the embroidery. You can adjust the size of the shape,
rotate, and move as desired. Once the border line or shape is ready, as shown below, you may create an External, Internal or an Overlay Border.
You can create a picture frame using Draw Border Shape; first with an External Border, then with an Internal Border on the remaining design.
Technique Tune-Up
Technique Tune-Up
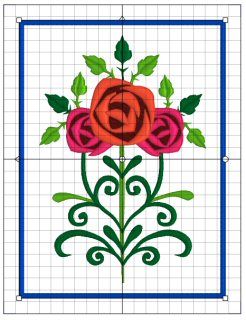
A Border can be placed around a design or around the inside edge of the hoop. In 6D™ Embroidery Extra this feature has its own tab, together with the new Motif Underline function. The Border feature is part of the Frame tab in 5D™ Embroidery Extra.
Select a margin width (how far away from the design the border should be) and whether to use rounded or square corners. Then select a border type from motif line, satin border, running stitch and triple stitch. Click Options to set the properties for each border type. Select whether to combine the border with the embroidery, then, with the design selected, click Apply.
The example at the top of the section uses a Satin Border fitted to the design with 1/2" margin, while the embroidery below has a Satin Border 1/2" away from the hoop edge.
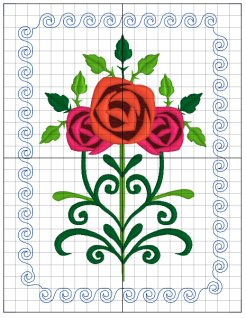
For a more decorative effect, try a Motif Border. The example below has a 6mm margin from design, and the corners are not rounded.
 QuiltDesign Creator
QuiltDesign Creator
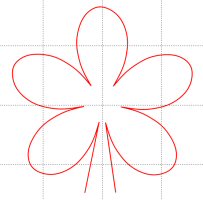
Multiply  is one of several design tools found in the 5D™ and 4D™ QuiltDesign Creator programs to help your creativity. Symmetrical designs can be created quickly and easily.
The Multiply feature repeats designs automatically by reflecting or rotating across or down.
is one of several design tools found in the 5D™ and 4D™ QuiltDesign Creator programs to help your creativity. Symmetrical designs can be created quickly and easily.
The Multiply feature repeats designs automatically by reflecting or rotating across or down.
All changes in the design, such as adding, editing, pasting and removing lines and groups, are multiplied. You can use the select tools, Rotate, and Group and Ungroup, while Multiply is active. Simply click the Multiply tool again to set the design.
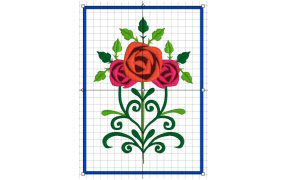
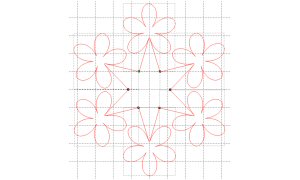
Start with a single design selected, then click Multiply.
Select Rotate 6-Way, then click OK. Resize, rotate, and edit nodes to achieve the desired effect. Click Multiply again to set the design, as shown in the "flower star" at the beginning of this section.
This Multiply tool is similar to the Multiply feature found in 6D™ and 5D™ Design Creator (in the Draw window).
Fun Facts to Know and Tell
Did you know that you can create customized thread ranges known as MyThread Ranges using Thread Manager in 6D™ Configure?
Best wishes for a very happy holiday season from 6D™
P.S. Watch for the 6D™ newsletter next month, as we look at creating embroideries with the ExpressDesign Wizard.

VANTAGE™ Embroidery Software Support is a membership program which provides education and support of the HUSQVARNA VIKING® & PFAFF 6D™ and 5D™ Embroidery Systems, QuiltDesign Creator, TruEmbroidery™ 3 and TruEmbroidery™ Software for Mac® computers. The VANTAGE™ program is currently available in the US, Canada, and Australia. Please visit your authorized HUSQVARNA VIKING® or PFAFF® dealer to learn more and sign up today.

#286 Majestic Layers (920429096)
Create quilts, cushions, bags and more with these gorgeous flower and butterfly motifs! 10 embroideries are designed with two layers of appliqué. The collection also includes three majestic and 11 outline embroideries. Hoop sizes for this HUSQVARNA VIKING® collection (available next month) range from the Designer™ SPLENDID SQUARE HOOP 120x120mm to the Designer ™ MAJESTIC HOOP 360mmx350mm.
#482 Cushion Creator (821093096)
This collection offers endless possibilities to embellish home décor garments and is perfect for creating beautiful cushions. Design combination examples are found in the booklet, and Tips and Hints on the cd. Hoop sizes for this PFAFF® collection (available next month) range from the creative™ PETITE SQUARE HOOP 80x80mm up to the creative™ GRAND DREAM HOOP 360mmx350mm.